
DSPy: Stop Writing Prompts. Start Programming Them.
A practical, beginner-friendly guide to DSPy, the framework that makes your LLM apps easier to maintain. Build a working multi-agent system with LangGraph by the end.
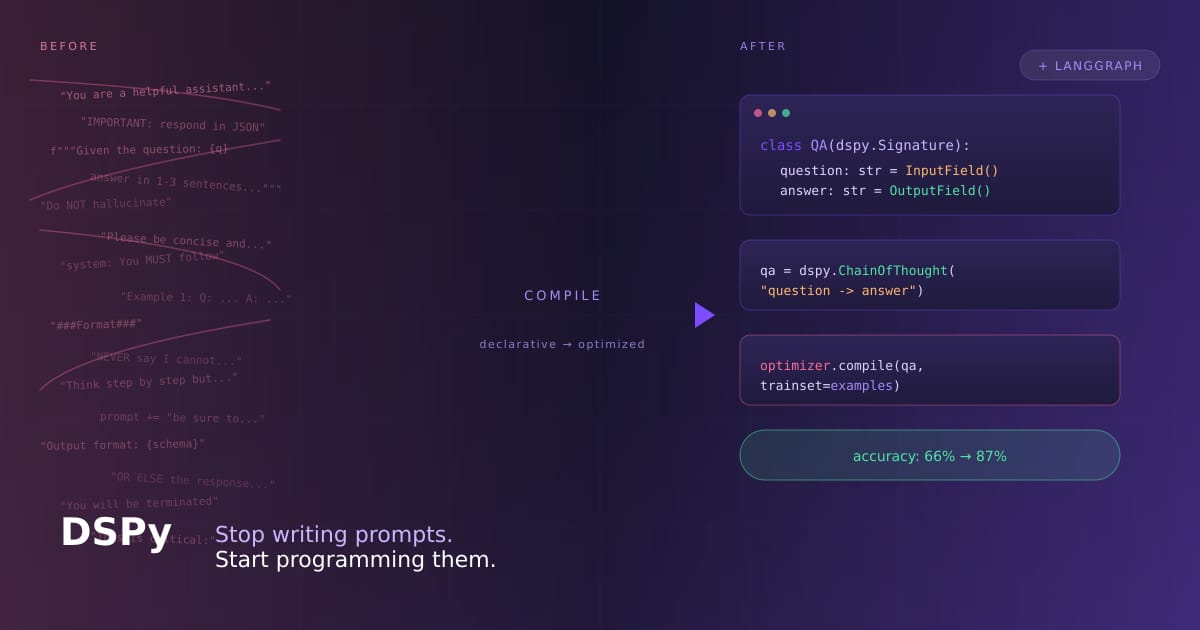
A practical, beginner-friendly guide to the framework that makes your LLM apps easier to maintain. We will also build a small project using LangGraph at the end.
The Problem Nobody Warns You About
You build an LLM app. It works. You feel great.
Then OpenAI ships a new model. Or you switch to Claude to cut costs. Or you bring in Llama for compliance reasons. Suddenly, your prompts behave differently. The polite "Please respond in JSON format with exactly these fields..." that worked on GPT-4 starts producing broken output on Claude. The few-shot examples you spent two weekends tuning are now overfit to the old model.
So you start tweaking again. Adding "IMPORTANT:" in caps. Adding more examples. Rewriting the system message. Twelve hours later, you have a prompt that works for this model, on this dataset, until the next thing changes.
This is the dirty secret of modern LLM work. Most "prompt engineering" is just messy string concatenation with extra stress.
DSPy exists to fix this.
What DSPy Actually Is (in plain English)
DSPy stands for Declarative Self-improving Python. It is an open-source framework from Stanford NLP. The idea is to treat prompts the way PyTorch treats neural networks. They become compiled artifacts you generate from higher-level code, not strings you write by hand.
The official tagline is "programming, not prompting" language models. That sounds buzzword-heavy, so let me translate.
In a normal LLM app, you write something like this:
prompt = f"""You are a helpful assistant. Given the following question,
answer in 1-3 sentences. Be concise. Do not hallucinate.

Question: {question}
Answer:"""
In DSPy, you write this:
qa = dspy.ChainOfThought("question -> answer")
result = qa(question="What is the capital of France?")
That is it. No prompt template. You declared a signature (question -> answer) and picked a module (ChainOfThought, which means "think step by step before answering"). DSPy compiles that into an optimized prompt at runtime, fits it to whatever model you set up, and parses the output back into a typed Python object.
The really interesting part comes next. You can give DSPy a small dataset of examples and a metric, and it will automatically optimize the underlying prompt. It picks better instructions, chooses the most useful few-shot demonstrations, even rewrites the wording, all to maximize your metric. You do not write the optimized prompt. The compiler does.
People describe this shift as moving from assembly to C for LLM apps.
Why DSPy: The Honest Case
Skipping the marketing pitch, here is why this framework matters in practice.
1. Your code becomes portable across models. A signature like document -> summary is model-agnostic. Swap GPT-4o for Claude for a local Llama and your code does not change. DSPy regenerates the prompt for the new model. This alone is worth it if you are cost-conscious or worried about vendor lock-in.
2. Prompts become optimizable, not artisanal. DSPy ships with optimizers like BootstrapFewShot, MIPROv2, and the newer GEPA. Hand them training examples and a metric, like "did the answer match the gold label?", and they search the space of prompts and demonstrations for you. Quality gains in the 10 to 40 percent range over manual prompting are common.
3. Composition works the way it should. Multi-step pipelines like retrieval, then reasoning, then verification are just Python modules calling other Python modules. No fragile chains of string templates.
4. It plays nice with the rest of your stack. DSPy is not trying to replace LangGraph or LlamaIndex or your vector DB. It is the reasoning core. Use LangGraph for stateful orchestration, DSPy for the LM calls inside each node, your vector DB for retrieval. Everyone stays in their lane.
5. You can debug what actually happened. dspy.inspect_history() shows you the exact prompt that was sent and the exact response. No more guessing what your "chain" actually did.
Who Should Use DSPy
Be honest about where you are. DSPy is not the right tool for everyone.
You should use DSPy if:
- You are building anything beyond a one-off ChatGPT-style demo. Classifiers, RAG systems, agents, multi-step pipelines.
- You expect to switch or upgrade models at some point. Everyone does.
- You have, or can collect, even 20 to 50 labeled examples of what good output looks like. That is enough to optimize.
- You care about reproducibility. Being able to re-run the same logic six months from now and get sane behavior.
- You are tired of prompts that are 600 words long and growing.
The sweet spot is mid-complexity LLM apps where prompt quality actually matters and you will iterate on it. RAG systems are the classic example. Agent workflows are catching up fast.
The Mental Model: Three Concepts
If you internalize these three things, you can read any DSPy codebase.
1. Signatures: what the LM should do
A signature is a typed declaration of inputs and outputs. The shorthand form is a string:
"question -> answer"
"document -> summary"
"context, question -> answer"
"sentence -> sentiment: bool"
The class-based form lets you add descriptions and type hints:
class Classify(dspy.Signature):
    """Classify the sentiment of a movie review."""
    review: str = dspy.InputField()
    sentiment: Literal["positive", "negative", "neutral"] = dspy.OutputField()
    confidence: float = dspy.OutputField(desc="0.0 to 1.0")
Notice you are describing what, not how. No "please" and no "be careful." That is the compiler's job.
2. Modules: how the LM should do it
Modules are the strategies. Same signature, different module gives different reasoning behavior.
dspy.Predict: just answer.dspy.ChainOfThought: think step by step before answering. Adds areasoningfield automatically.dspy.ProgramOfThought: generate code, run it, use the result.dspy.ReAct: an agent that can call tools.dspy.Refineanddspy.BestOfN: run multiple times and pick the best. These replace the olderAssertandSuggestAPI in DSPy 2.6+.
Swap modules freely. The signature stays the same.
3. Optimizers: making it better automatically
This is the magic part. You give the optimizer three things:
- Your program, which is a module or a composition of modules.
- A small training set of
dspy.Exampleobjects. - A metric function that returns a number. Higher is better.
It searches over instructions and few-shot demonstrations to maximize the metric. The common ones to know:
- BootstrapFewShot: selects effective few-shot examples from your training data. Cheap and fast. Start here.
- MIPROv2: jointly optimizes instructions and demonstrations. More expensive, often noticeably better.
- GEPA: newer, uses reflective feedback loops. State of the art for some tasks as of 2026.
You compile once, save the optimized program, deploy. That is the workflow.
How DSPy Fits Into a Modern LLM Stack
Here is the honest layout of a production-ish LLM app in 2026:
| Layer | Job | Examples |
|---|---|---|
| Model provider | The actual LM | OpenAI, Anthropic, Google, Ollama, vLLM |
| Reasoning core | Define and optimize how the LM thinks | DSPy |
| Orchestration | State, branching, multi-step flows | LangGraph, LlamaIndex Workflows |
| Retrieval | Vector search, hybrid search | Weaviate, Pinecone, ColBERT, pgvector |
| Observability | Tracing, evals, debugging | Langfuse, LangSmith, Arize |
This is the combo we will build in the project below.
The Project: A Self-Improving Question Router with LangGraph and DSPy
Time to get hands dirty. We will build something small but real.
A multi-agent question-answering app that:
- Takes a user question.
- Uses a DSPy classifier to route it to one of three specialist agents:
factual,creative,math. - Uses LangGraph for routing and state management.
- Has each specialist agent powered by a DSPy module suited to its job.
- Can be optimized with a handful of labeled examples to improve routing accuracy.
By the end you will have something runnable, plus a feel for how the pieces fit together.
Prerequisites
- Python 3.10 or higher
- An API key for any supported LM (OpenAI, Anthropic, Google, or local via Ollama)
- About 30 minutes
Step 1: Install
pip install dspy langgraphStep 2: Configure your LM
DSPy uses LiteLLM under the hood, so the same syntax works for every provider:
import dspy
import os

# Pick one based on what you have a key for
lm = dspy.LM("openai/gpt-4o-mini", api_key=os.environ["OPENAI_API_KEY"])
# lm = dspy.LM("anthropic/claude-sonnet-4-5", api_key=os.environ["ANTHROPIC_API_KEY"])
# lm = dspy.LM("ollama/llama3.1")  # local

dspy.configure(lm=lm)
Step 3: Define your DSPy modules
from typing import Literal

class QuestionClassifier(dspy.Signature):
    """Classify a user question into one of three categories."""
    question: str = dspy.InputField()
    category: Literal["factual", "creative", "math"] = dspy.OutputField(
        desc="factual = needs a real-world fact; creative = needs imagination/writing; math = needs calculation"
    )

class FactualAnswer(dspy.Signature):
    """Answer a factual question concisely and accurately."""
    question: str = dspy.InputField()
    answer: str = dspy.OutputField(desc="1-3 sentences, factual, no fluff")

class CreativeAnswer(dspy.Signature):
    """Respond to a creative prompt with imagination and flair."""
    question: str = dspy.InputField()
    answer: str = dspy.OutputField(desc="Vivid, original, 2-4 sentences")

class MathAnswer(dspy.Signature):
    """Solve a math problem, showing your work."""
    question: str = dspy.InputField()
    answer: str = dspy.OutputField(desc="The final numeric answer, plus brief reasoning")

# Wire them up with appropriate modules
classifier = dspy.ChainOfThought(QuestionClassifier)
factual_agent = dspy.Predict(FactualAnswer)
creative_agent = dspy.Predict(CreativeAnswer)
math_agent = dspy.ChainOfThought(MathAnswer)  # CoT helps with math
Notice that each agent uses the module that fits its job. The math agent gets ChainOfThought because step-by-step helps. The factual agent uses plain Predict because we want a tight answer.
Step 4: Build the LangGraph
from langgraph.graph import StateGraph, END
from typing import TypedDict

class State(TypedDict):
    question: str
    category: str
    answer: str

def classify_node(state: State) -> State:
    result = classifier(question=state["question"])
    return {**state, "category": result.category}

def factual_node(state: State) -> State:
    result = factual_agent(question=state["question"])
    return {**state, "answer": result.answer}

def creative_node(state: State) -> State:
    result = creative_agent(question=state["question"])
    return {**state, "answer": result.answer}

def math_node(state: State) -> State:
    result = math_agent(question=state["question"])
    return {**state, "answer": result.answer}

def route(state: State) -> str:
    return state["category"]

# Assemble
graph = StateGraph(State)
graph.add_node("classify", classify_node)
graph.add_node("factual", factual_node)
graph.add_node("creative", creative_node)
graph.add_node("math", math_node)

graph.set_entry_point("classify")
graph.add_conditional_edges("classify", route, {
    "factual": "factual",
    "creative": "creative",
    "math": "math",
})
graph.add_edge("factual", END)
graph.add_edge("creative", END)
graph.add_edge("math", END)

app = graph.compile()
Step 5: Run it
result = app.invoke({"question": "What is 17 times 24?"})
print(f"Category: {result['category']}")
print(f"Answer: {result['answer']}")

result = app.invoke({"question": "Write a haiku about debugging."})
print(f"Category: {result['category']}")
print(f"Answer: {result['answer']}")
You now have a working multi-agent system in roughly 80 lines of code.
Step 6: Optimize the classifier
The raw classifier works, but it will misroute edge cases. Let us give it 8 labeled examples and let DSPy improve it:
trainset = [
    dspy.Example(question="What year did WW2 end?", category="factual").with_inputs("question"),
    dspy.Example(question="Who painted the Mona Lisa?", category="factual").with_inputs("question"),
    dspy.Example(question="Write a poem about rain.", category="creative").with_inputs("question"),
    dspy.Example(question="Invent a name for a coffee shop.", category="creative").with_inputs("question"),
    dspy.Example(question="What is 144 divided by 12?", category="math").with_inputs("question"),
    dspy.Example(question="If a train leaves at 3pm going 60mph...", category="math").with_inputs("question"),
    dspy.Example(question="Tell me a short story about a robot.", category="creative").with_inputs("question"),
    dspy.Example(question="What is the boiling point of water?", category="factual").with_inputs("question"),
]

def accuracy(example, pred, trace=None):
    return example.category == pred.category

from dspy.teleprompt import BootstrapFewShot
optimizer = BootstrapFewShot(metric=accuracy, max_bootstrapped_demos=4)
optimized_classifier = optimizer.compile(classifier, trainset=trainset)

# Save it
optimized_classifier.save("classifier_v1.json")Step 7 (bonus): Inspect what DSPy actually did
dspy.inspect_history(n=1)You will see the actual prompt that got sent to the LM. Instructions, few-shot demonstrations, the works. This is where you stop treating the framework as a black box.
Tips for Beginners
If I could go back to the day I started with DSPy, here is what I would tell myself.
1. Start with dspy.Predict. Do not reach for ReAct or ProgramOfThought on day one. Get a feel for signatures first. Add complexity only when you measure that you need it.
2. Write your metric before you write your optimizer call. A bad metric is worse than no metric. The optimizer will dutifully maximize the wrong thing. If you cannot write a metric, you cannot optimize. That is a feature, not a bug.
3. Twenty examples is enough to start. You do not need 10,000 labeled samples. DSPy is designed for small data. If you can get 20 good examples and 20 dev examples, you can run a real optimization.
4. Use inspect_history() constantly. It is the print-debugging of DSPy. When something behaves weird, look at the actual prompt that got generated. Nine times out of ten the bug is obvious once you see it.
5. Save optimized programs to disk. Re-running expensive optimizers every time you start your app is painful. Compile once, save the JSON, load it in production.
6. DSPy plus LangGraph means DSPy lives inside graph nodes. Do not try to make DSPy do the orchestration. Let LangGraph handle state, branching, and retries. Let DSPy handle what the LM should say at each step.
7. Observability matters early. Plug in Langfuse or LangSmith before your pipeline gets complicated. Tracing a 6-step DSPy plus LangGraph flow without observability is a special kind of pain.
8. Read the cheatsheet, not just the tutorials. The DSPy cheatsheet on the official docs is the single highest-value resource. Bookmark it.
Useful Resources
These are the links worth keeping open in a tab while you learn.
Where to Go From Here
You now have:
- A mental model for what DSPy is and why it exists.
- A clear sense of whether it fits your use case.
- A working multi-agent app combining LangGraph and DSPy.
- An optimized classifier you trained yourself.
Some honest next steps, in order of difficulty:
- Extend the project. Add a fourth agent type. Add retrieval to the factual agent and turn it into a tiny RAG. Add a verification step that checks the answer before returning.
- Try a different optimizer. Swap
BootstrapFewShotforMIPROv2. Compare the prompts each one produces. - Swap models. Change one line, your
dspy.LM(...), and run the whole thing on Claude or a local model. Notice that nothing else breaks. - Read the GEPA paper and the MIPROv2 docs. Once you have built one app, the research papers actually make sense and they are surprisingly readable.